Posted January 1, 2016
Scripted Watermark Embedding
BY Geoffrey Karr

Today's topic will be remedial for many Photoshop users.If, by chance, you've not tried creating scripted actions to automate tasks, this will be a simple introduction to a great tool within Photoshop.
I'd like to thank Alastair Reed for taking the time to walk through this outline of the process. He's an experienced Photoshop user who had never scripted an action before.
We'll start very simply and record an action that will embed a watermark.The sample file is from the March 8th visual watermarking example.I've flattened the layers and resized to the size I want to display on the web.
Next you'll need to have the "Actions" palette opened. You can open the "Actions" palette by selecting it from the Windows menu list.
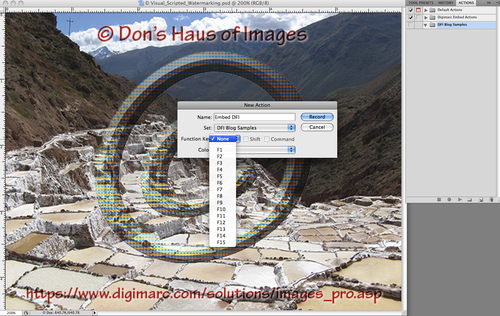
I've selected the "Actions" palette and have created a new folder for a set of actions called DFI Blog Samples to help organize the scripts that I create. (By the way...DFI is short for Digimarc for Images) Now I create a new action called "Embed DFI" with the DFI Blog Samples folder selected.I can assign it an "F" key to run the action later as a key command if I want. Photoshop's "Help" can provide shortcuts and more operational details for the "Action" palette for your version of Photoshop.
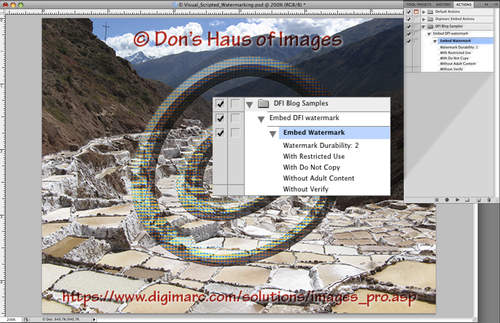
Click "Record" and your next actions within Photoshop will be recorded.In this case, I am going to select the DFI plug-in, choose my settings and not select the "Verify" option. Since I want to automate this process, I do not want the "Verify" window to pop-up and require me to close the window. This means you'll want to decide on your watermark settings prior to recording. The Digimarc for Images Best Practices Guide can help you with the selection of a setting.
Stop the recording by either using the drop down menu on the right side of the palette or clicking on the stop button at the bottom of the palette.
You can see the DFI plug-in filter settings by expanding the "Action" window once you've stopped the recording.
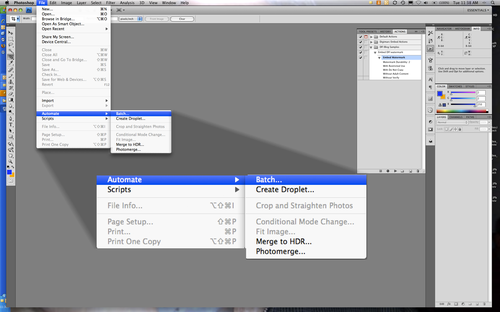
Now select "Automate" and "Batch" from the file menu.
To test this automation of the action script, I've created a folder with 3 images, along with an output folder to save the new files, making sure my automation is working correctly.
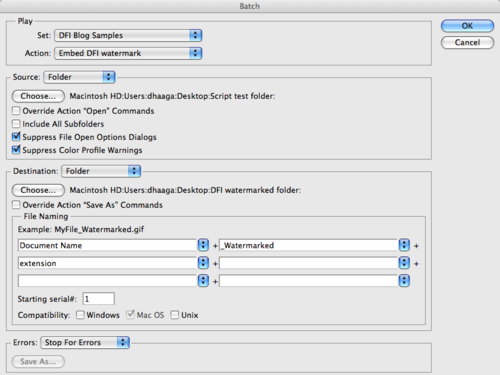
Batch settings can be a little tricky the first few times you try it, which is why I created this small test set to practice with. Notice that I have the DFI Blog Samples set and the Embed DFI watermark action selected to "Play." I've set up the batch process and added "_Watermarked" to my output file name. Once the automation is complete I can open up my watermarked images and verify the watermarks to confirm that all settings will be good for the final set of images I want to process.
No doubt you've realized that you can record longer actions.I used to batch process 3,000 images a day for educational CDs back in the early 90's thanks to scripts running all night on my 660AV Mac.
This is a very simple intro to the automation process in Photoshop.I'll cover more automation in the future, especially if requested.Don't forget the Adobe website, Photoshop user groups like NAPP, and Photoshop podcasts for lots more tips on automating in Photoshop.